Microsoft is putting all its resources on Windows 10, and yet, after every major update, it somehow manages to break basic features. Just recently, following the Windows 10 update on September 10, many users faced microphone issues on the latest build. To be frank, microphone problems on Windows 10 are not new and they have been bugging users since a very long time. Nevertheless, in this article, we are going to show you how to resolve microphone issues in Windows 10. We have provided four different ways to fix the issue and the steps are quite easy and straightforward. Now having said that, let’s begin the article.
Fix Microphone Issues in Windows 10 in 2019
As already mentioned, we have included 4 different ways to fix the microphone bug. The methods are quite simple and anyone with basic computer knowledge can resolve the issue. With that said, here is the first method that you should begin with.
1. Manage Microphone from Windows Settings
Before we dive into advanced settings, let’s ensure that microphone settings are correctly configured. To do so, we will go through some Windows Settings first and then move to advanced steps. Here is the first step to follow.
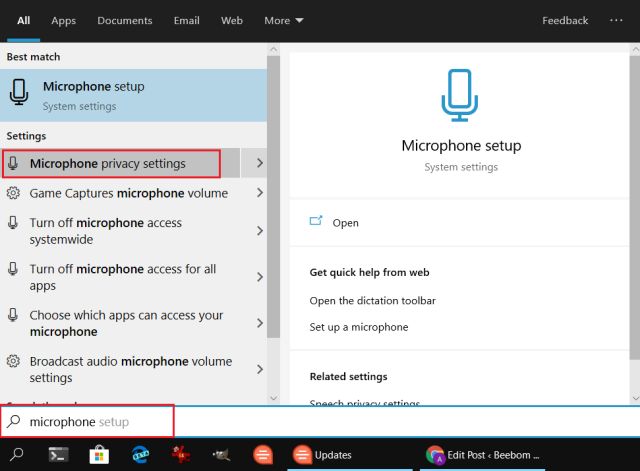
1. Press the Windows key once and type “microphone” in the search box. Click on “Microphone Privacy Settings” from the search result.
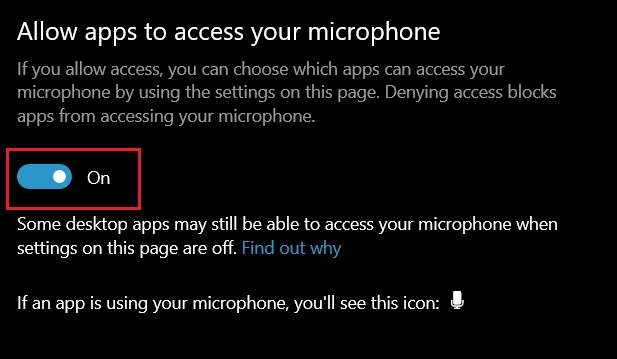
2. Here, make sure “Allow apps to access your microphone” is turned on.
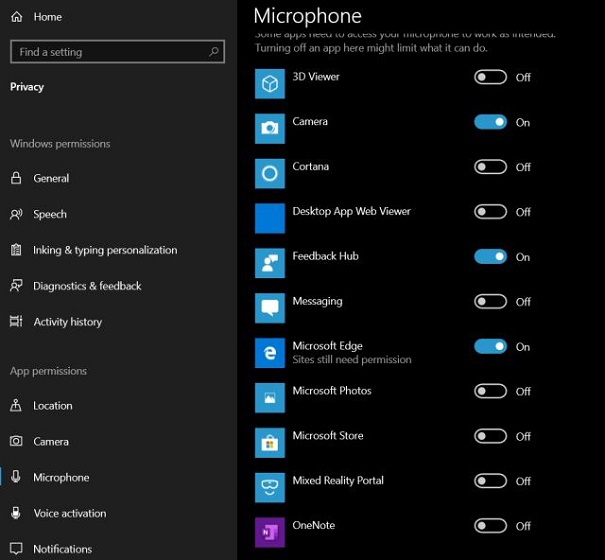
3. After that, scroll down and inspect microphone access for all apps. Turn on microphone permission for apps that you particularly use for video calling or audio recording. Similarly, turn off microphone access for apps that you don’t use often.
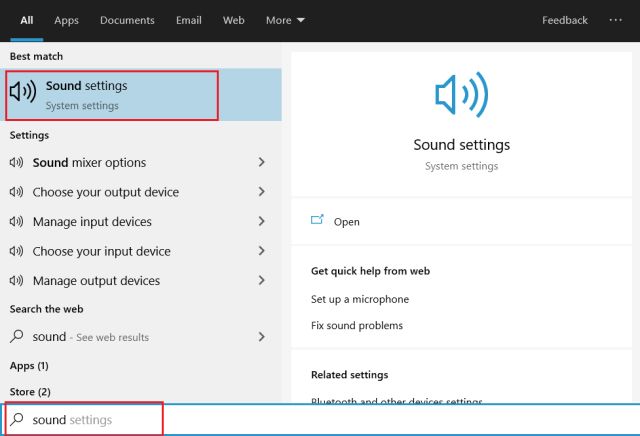
4. Now, close the window and type “sound” in the Windows search box. Here, click on “Sound Settings”.
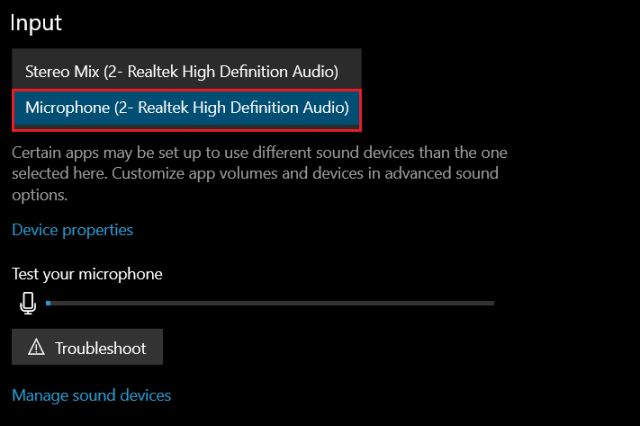
5. Scroll down and you will find “Input” section. Here, make sure to select your microphone from the drop-down menu. In case, it does not have any microphone listing, chances are your microphone is damaged or there are driver issues. I have explained how to update the audio driver in the last section of this article so go through that.
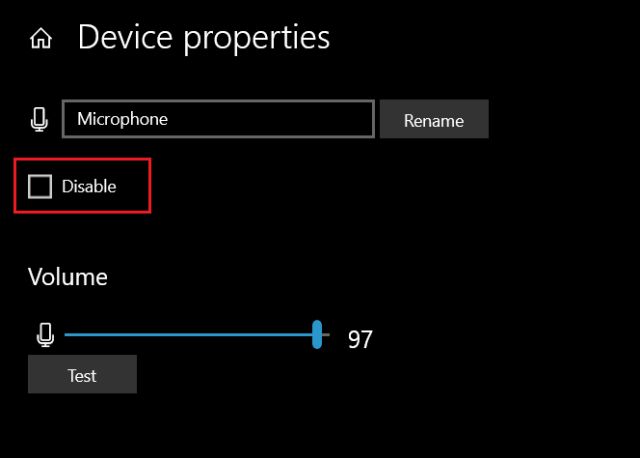
6. Next, click on “Device properties” just below the mic setting. Here, make sure the “Disable” box is unchecked. Now, restart your computer and check if the microphone is working in Windows 10.
2. Configure Microphone Settings from Control Panel
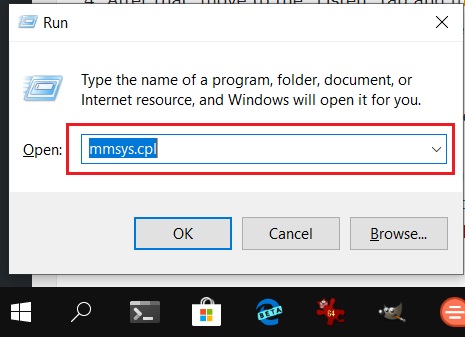
1. Press “Windows” and “R” key at once and a small Run window will open up at the bottom-left corner. Here, type “mmsys.cpl” and hit enter.
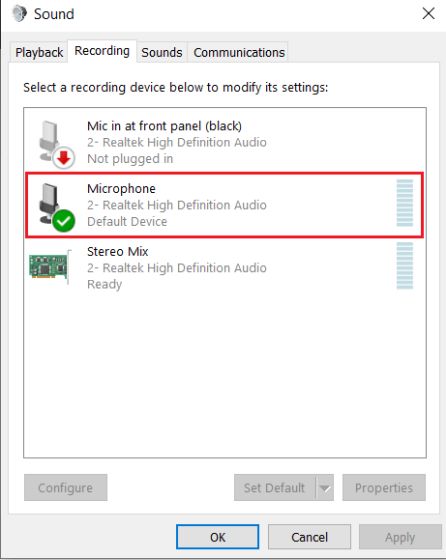
2. A sound window will open. Here, move to the “Recording” tab and you will find your microphone device here. Double-click on it and a properties window will open.
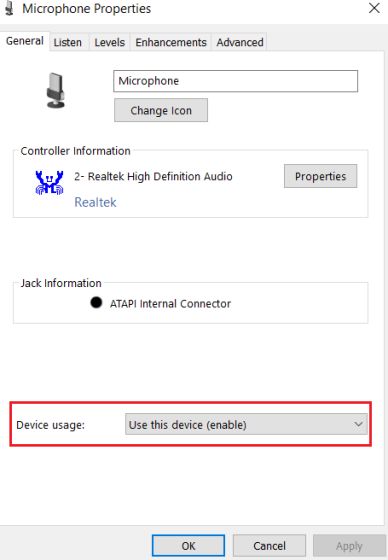
3. Here, on the General tab, make sure “Device Usage” is enabled.
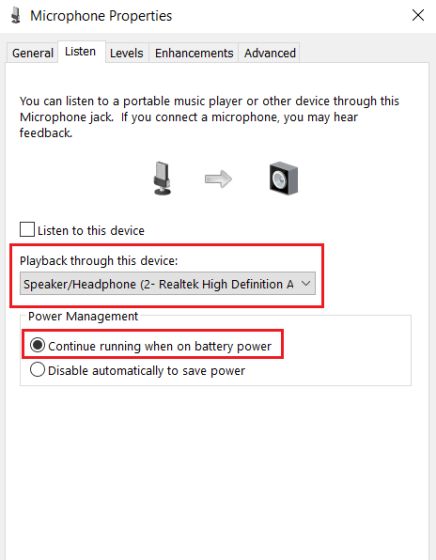
4. After that, move to the “Listen” tab and manually select your microphone device. Following that, select “Continue running when on battery saver” and click on the “Apply” button.
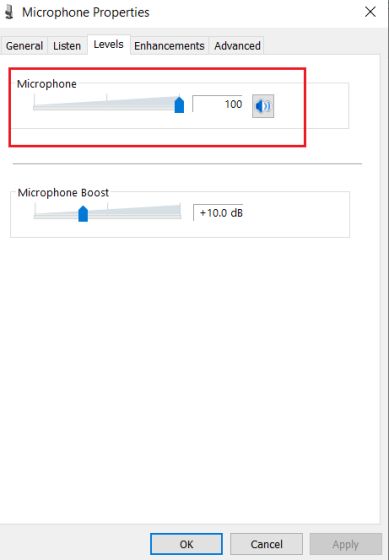
5. Now, switch to the “Levels” tab and ensure the “Microphone Level” is close to 100.
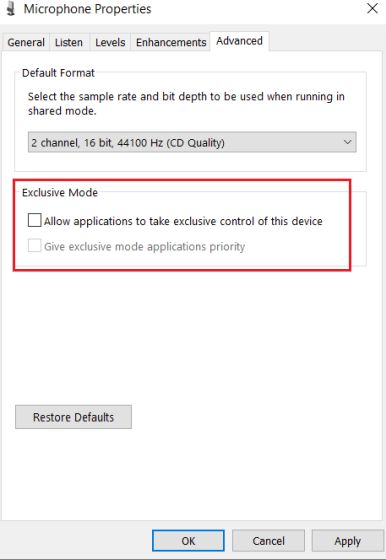
6. Having done that, move to the final “Advanced” tab and uncheck both the boxes under the “Exclusive mode” section. Finally, apply the changes and click on the “Ok” button. Now, restart your Windows 10 PC and you should have a working microphone this time.
3. Adjust Game Bar Settings
If you are unable to record your audio while playing games in Windows 10 then this method will help you fix microphone issues in Windows 10. Here is how to go about it.
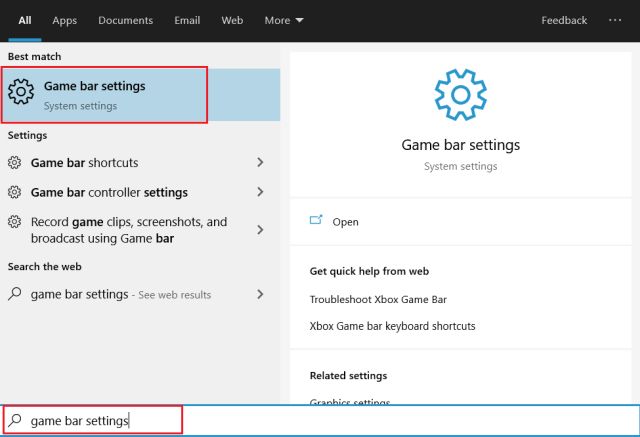
1. Press the “Windows” key again and type “game bar settings”. Now, click on the top result.
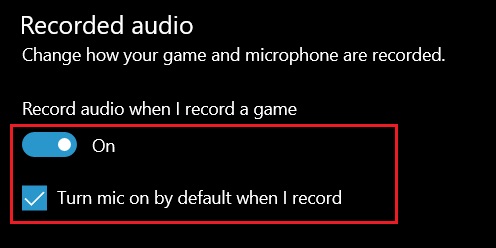
2. Next, switch to the “Captures” tab on the left side and scroll down to “Recorded audio”. Here, enable the toggle and check the box located below. These changes will allow you to record audio while you are playing a game.
4. Update Audio Driver
If everything fails then it might be the audio driver which has become incompatible with the operating system and hardware device. To fix microphone bug in Windows 10, we need to update the drives as our last resort.
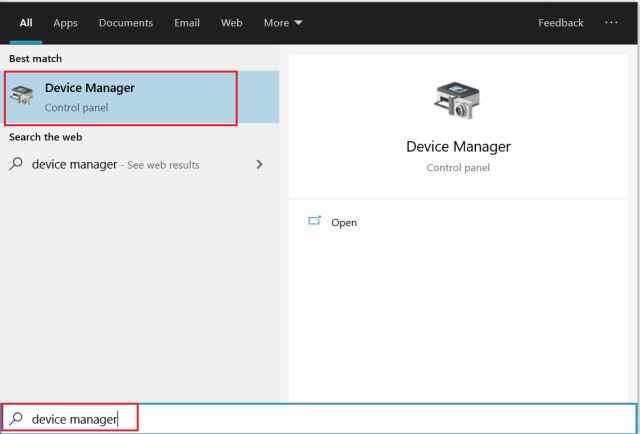
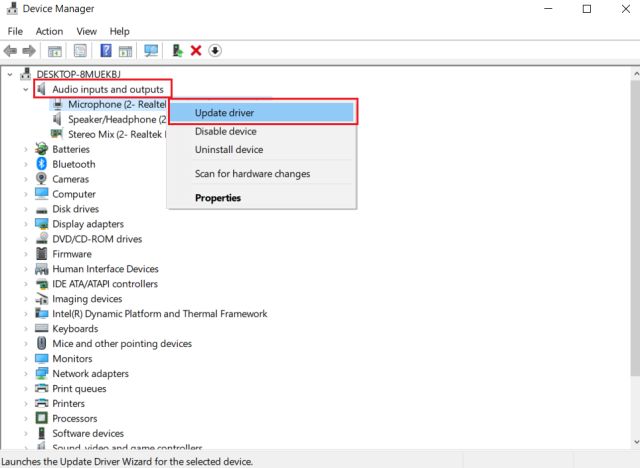
1. Type “Device Manager” in the Windows search box and open the top result.
2. Here, double-click on “Audio inputs and outputs” and the menu will expand. Now, right-click on “Microphone” and select “Update Driver”.
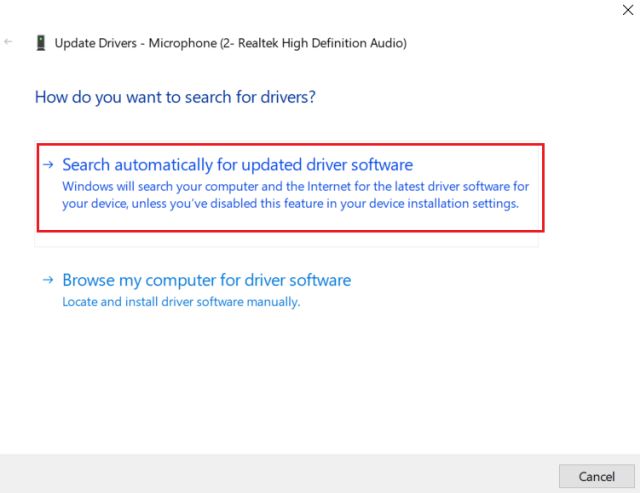
3. On the next window, click on “Search automatically” and it will check for the latest audio driver from the internet. So, make sure you are connected online. After that, restart your PC and hopefully this time the microphone bug goes away on your Windows 10 PC. In case, the microphone is still not working then in all probability, it’s physically damaged. That means you will either have to use an external microphone or take your device to a service center to get repaired.
SEE ALSO: How to Speed up Windows 10 in 2019 [Effective Methods]
Fix Microphone Issues in Windows 10 in Four Easy Ways
So that was our short article on how to resolve microphone issues in Windows 10. We have included some general and advanced steps to fix the issue. Most of the time, the microphone does not work because some other app keeps blocking the access. So, follow the first method step by step and it should fix most of the issues. Anyway, that is all from us. If you found the article helpful, do let us know in the comment section below.